iPhone Dual SIM (Duo) Explained: How to Set Up eSIM and Physical SIM Together
Half of the questions people ask about their iPhone now start with the same words: “Can I use two numbers on it?” Maybe you want to keep your work and personal lines apart. Maybe you travel and are tired of paying roaming fees. Maybe you simply found a cheaper data plan with another carrier and would like to use it without losing your current number.
The good news is that every modern iPhone can do exactly that. Apple calls it Dual SIM, and many people casually call it “Duo SIM” or “dual number.” It lets one iPhone use two phone lines at the same time, usually with a physical SIM card and an eSIM together, or with two eSIMs.
The less good news is that the setup can be confusing. Which iPhones support it? Do you need a physical card at all? What happens if you are in the United States, where there is no SIM tray? How do you choose which line makes a call, sends a text, or uses data?
In this guide, we explain everything in plain English: what dual SIM and eSIM really mean, which iPhones support them, how to set up an eSIM and a physical SIM together step by step, how to configure each line properly, and how to fix the most common problems. Whether you are a first-time user or you have been fighting a stubborn QR code for an hour, you will find the answer here.
A quick note: Apple regularly adjusts menu names and options between iOS versions, and some features depend on your carrier and region. The steps below match recent versions of iOS. If a menu looks slightly different on your phone, use the search bar at the top of Settings.
The Short Answer
If you want the quick version, here it is.
- Dual SIM means one iPhone, two active phone lines. Each line has its own number, and you can call, text, and use data on either one.
- You can combine a physical SIM and an eSIM, or use two eSIMs, on most iPhones from the iPhone 13 onward, and a physical SIM plus one eSIM on the iPhone XS and XR and later.
- Some iPhones have no SIM tray at all. Models sold in the United States since the iPhone 14 are eSIM-only, and the iPhone 17 line is eSIM-only in several other countries too.
- Setup takes about five minutes. Go to Settings, tap Cellular (or Mobile Data), choose Add eSIM, and follow the steps from your carrier.
- After setup, label your lines and choose a default for calls, messages, and data. That is what makes dual SIM feel simple instead of messy.
What Is Dual SIM on an iPhone?
A SIM is the small identity that connects your phone to a mobile network and gives you your number. Traditionally, a phone had one SIM slot, so you could use one number at a time.
Dual SIM changes that. It allows two lines to be active on the same device. Each line can belong to a different carrier or plan. You might have:
- A personal number and a work number
- A home plan and a cheap travel data plan
- A main carrier for calls and a second carrier with a bigger data allowance
- A local number in a country where you live part of the year
Both lines can receive calls and texts, and you can choose which one is used for each action. Dual SIM on the iPhone is designed so that you can see which line is which and switch easily.
One point to understand early: dual SIM does not mean you have two phones in one. It is one iPhone, with one battery and one set of apps, that happens to be connected to two numbers. That is why a few features, such as standby behavior during calls, work a little differently from a phone with only one line.
Physical SIM vs eSIM: What Is the Difference?
Understanding these two terms makes everything else easier.
Physical SIM
A physical SIM is the familiar plastic nano-SIM card you slide into a tray on the side of your iPhone. You can remove it, put it in another phone, and your number moves with it.
Advantages: it is simple, universal, and easy to swap between phones, even without an internet connection.
Disadvantages: you can lose or damage it, you need a pin or tool to open the tray, you cannot get one instantly online, and a thief can pull it out of a stolen phone.
eSIM
An eSIM is a digital SIM built into your iPhone. There is no card. Your carrier sends a small profile to your phone, usually through a QR code, an app, or an automatic activation, and the phone stores it electronically.
Advantages: you can activate a plan in minutes without visiting a shop, store several plans on one phone, switch between them in Settings, and it cannot be physically removed from a stolen phone. It also lets Apple use the space inside the phone for other components, and the eSIM-only versions of some recent iPhones even have a slightly larger battery.
Disadvantages: moving to a new phone requires a transfer process, not a simple card swap. If your phone breaks, you may need your carrier’s help to move the line. Not every carrier supports eSIM, especially smaller ones in some regions.
How They Work Together
When you use a physical SIM and an eSIM together, your iPhone treats them as two equal lines. You can designate one as your primary line and the other as secondary, but both can be active at once. On many newer iPhones, you can also use two eSIMs together and drop the physical card entirely.
Apple says an iPhone can store eight or more eSIM profiles, though only two lines can be active at the same time. That makes the iPhone a great travel phone, because you can keep a collection of local plans on your device and switch between them.
Which iPhones Support Dual SIM?
The answer depends on your model and where it was sold.
By generation
- iPhone XS, XS Max, and XR (2018) and later: support a physical nano-SIM plus one eSIM.
- iPhone 13 and later: support two eSIMs active at the same time, in addition to the physical SIM option on models that have a tray.
- iPhone 14 and later in the United States: eSIM-only. There is no SIM tray, so dual SIM means two eSIMs.
- iPhone 17 line: eSIM-only in the United States and in a small group of other countries and territories, including Canada, Japan, Mexico, and several Gulf countries, according to reports and carrier guides. In most other markets, such as Europe and many parts of Asia, a physical SIM tray still exists.
- iPhone Air: reported to be eSIM-only everywhere in the world.
- Mainland China models: sold with two physical nano-SIM slots and no eSIM support on most models.
Because Apple changes details with each generation, the safest way to confirm your phone is to check it directly.
How to check your own iPhone
- Open Settings > General > About.
- Scroll down and look for Available SIM or Digital SIM. If you see a field labeled with a second line or an EID number, your phone supports eSIM.
- Look at the side of the phone. A small SIM tray with a tiny hole means a physical SIM is supported.
- Check Apple’s tech specs page for your exact model and region.
If your phone is carrier-locked, one more point matters: a locked iPhone only works with the carrier that locked it. To use a second carrier’s line, the phone must be unlocked, or both lines must be from the same carrier. Check Settings > General > About > Carrier Lock to see whether your iPhone is unlocked.
Before You Start: A Quick Checklist
Make sure you have these things ready before you try to set up a second line.
- A compatible, unlocked iPhone running a recent version of iOS.
- A carrier that supports eSIM (or a physical SIM card from your second carrier).
- A plan or account with that carrier, or a travel eSIM purchased from a provider.
- A stable internet connection, either Wi-Fi or mobile data. Downloading an eSIM profile needs one.
- Your QR code or activation details from the carrier, either on another screen, printed, or in an email.
- A charged battery and about ten minutes.
- Your account PIN or login in case the carrier asks you to verify yourself.
If you are replacing a phone, check whether your current carrier offers a quick transfer tool. It will save you time later.
The Pros and Cons of Using Dual SIM
Before we set it up, it is worth knowing why people love it and what trade-offs to expect.
Benefits
- Separate work and personal life. Keep your private number off business cards and your work number off your personal contacts.
- Save money while traveling. Use a local data plan abroad without paying roaming charges.
- Better coverage. If one carrier has weak signal at home or work, a second line from another carrier can fill the gap.
- Keep your old number. Move to a new carrier for data while preserving the number everybody knows.
- Reduce the need for a second phone. One device does the job of two.
Drawbacks
- Battery use can rise slightly, because the phone keeps two lines connected.
- Calls on one line can affect the other. On many setups, if you are on a call on one line, an incoming call on the other line may go to voicemail unless Wi-Fi Calling is enabled for that line.
- Transfers take more steps than swapping a card.
- Some carriers charge extra for eSIM or a second line.
- Some services tied to one number, such as certain banking apps, may need extra setup.
For most people, the benefits outweigh the downsides, particularly if they travel or want a clean split between work and personal numbers.
How to Set Up an eSIM on Your iPhone
There are several ways to add an eSIM. Which one you use depends on your carrier. Start with the method your carrier recommends, and use the others as backups.
Method 1: Scan a QR code
This is the most common method, particularly for travel eSIMs and many carriers.
- Make sure you are connected to Wi-Fi or mobile data.
- Open Settings and tap Cellular (or Mobile Data).
- Tap Add eSIM (you may see Set Up Cellular or Add Cellular Plan).
- Choose Use QR Code.
- Scan the QR code from your carrier. It is usually shown on a screen, in an email, or on a printed sheet. If you only have the code on the same phone, take a screenshot or open it on another device, because you cannot scan your own screen with the same camera.
- Tap Continue and wait while the plan is activated. This can take a minute or two.
- When asked, name the new plan. Pick a clear label such as “Personal,” “Work,” or “Travel.”
- Choose your default settings (we cover these in the next section).
If the iPhone says it cannot add the plan, check that the QR code has not been used already. Many QR codes work only once.
Method 2: Use your carrier’s app or website
Many carriers now let you activate an eSIM directly through their app or an account page.
- Download and sign in to your carrier’s app.
- Find the option for eSIM or Add a line.
- Follow the on-screen instructions. The app typically triggers an alert from your iPhone asking you to confirm the new plan.
- Tap Allow or Add, then wait for activation.
This is often the easiest route because there is no code to scan.
Method 3: Transfer an eSIM from another iPhone
If you are upgrading or switching phones and your carrier supports it, you can move your line directly.
- Put both iPhones close together and make sure both are updated.
- On the new iPhone, go to Settings > Cellular > Add eSIM.
- Choose Transfer From Another iPhone (or Transfer From Nearby iPhone).
- A prompt appears on the old iPhone. Tap Transfer and confirm with a verification code if requested.
- Wait for the line to move. The old phone will lose that line.
If you are using the standard setup process for a new iPhone, Apple may offer to move your eSIM automatically during the Quick Start process.
Method 4: Convert a physical SIM to an eSIM
Some carriers allow you to convert your existing physical SIM card to an eSIM without a new card.
- Go to Settings > Cellular.
- Tap your physical SIM line, then look for Convert to eSIM. If you do not see it, your carrier may not support it.
- Follow the prompts and wait while the conversion completes.
- Once the eSIM is active, your physical card becomes inactive, and you can remove it.
This is a smart trick if you want to free up the SIM tray for a different carrier’s card.
Method 5: Enter details manually
If a QR code will not scan, many carriers also give you text details.
- Go to Settings > Cellular > Add eSIM > Use QR Code.
- Tap Enter Details Manually at the bottom of the screen.
- Type the SM-DP+ address, activation code, and any confirmation code your carrier provided.
- Tap Next and wait for activation.
Copy these details carefully, because a single typo will make the process fail.
How to Use a Physical SIM and an eSIM Together
If your iPhone has a SIM tray, setting up a physical SIM alongside an eSIM is straightforward.
- Power off your iPhone if you prefer, though it is not strictly required.
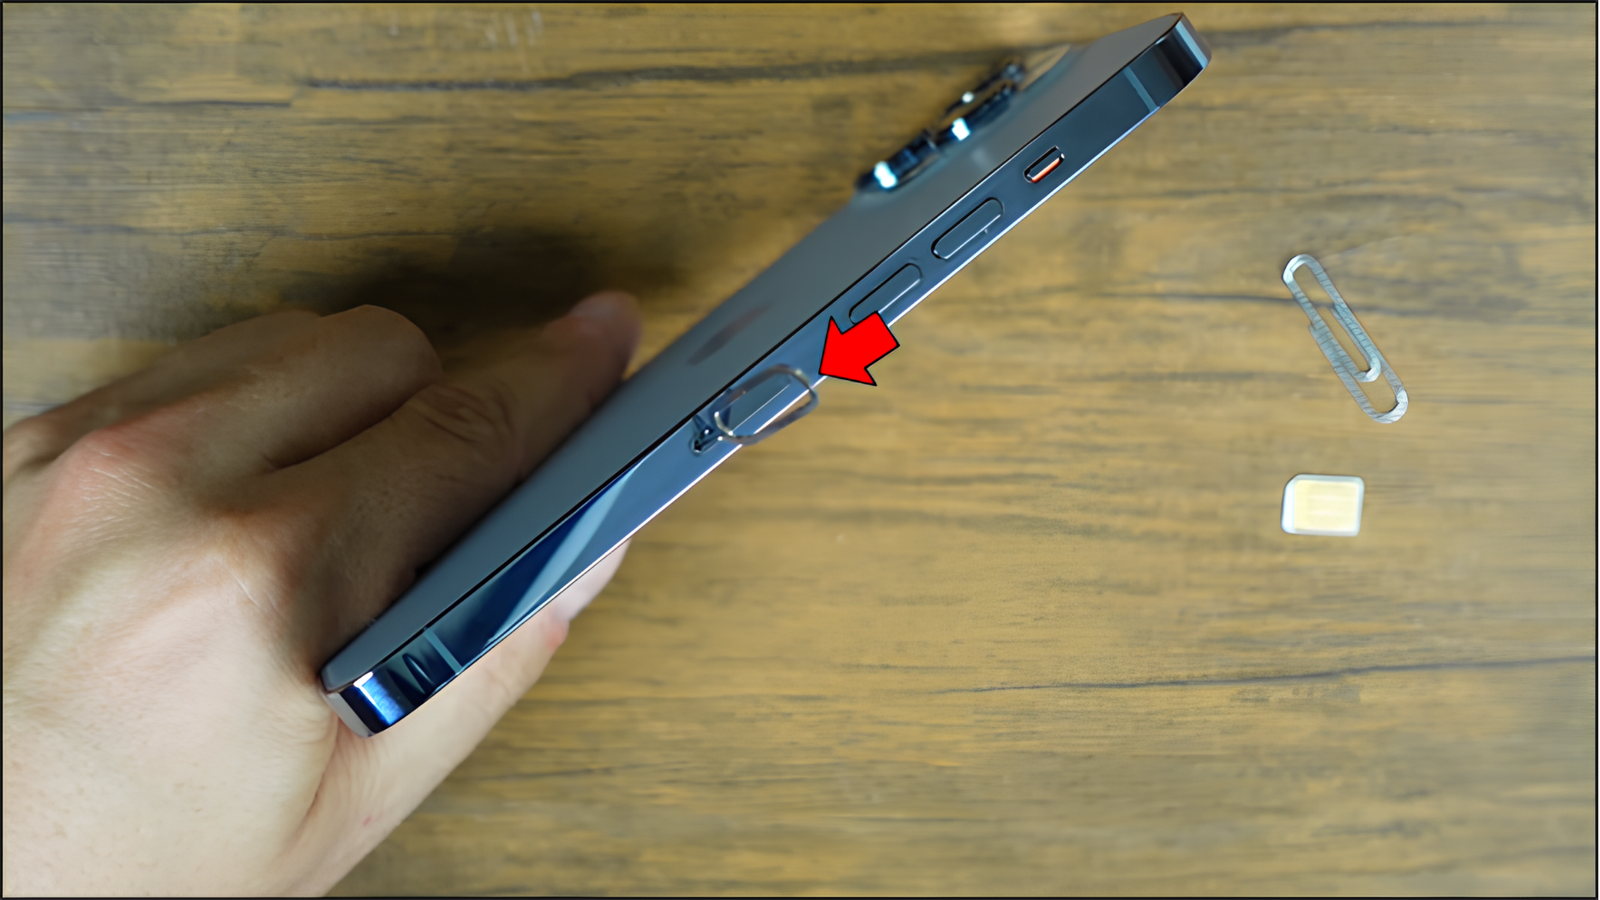
- Use the SIM tool or a small paperclip to open the SIM tray on the side of the phone.
- Place the nano-SIM card in the tray, matching the notched corner, and slide the tray back in.
- If the physical SIM has a PIN, enter it when prompted.
- Wait for the signal bars and carrier name to appear in the status bar.
- Add your eSIM using one of the methods above.
- Open Settings > Cellular and confirm that you see both lines listed under Cellular Plans or SIMs.
When both lines are active, you will see two sets of signal bars in the status bar, and you can start adjusting how each is used.
How to Configure Your Two Lines
Setup is only half the job. The most important step is deciding how each line behaves, so you do not accidentally call a client from your personal number or burn expensive roaming data.
Step 1: Label your lines
Go to Settings > Cellular, tap each line, and choose Cellular Plan Label. Pick a built-in label like Primary or Secondary, or choose Personal, Business, or Travel, or create a custom name. Labels appear in the Phone app, Messages, Contacts, and the status bar, which helps you tell the lines apart at a glance.
Step 2: Choose your Default Line
Under Settings > Cellular > Default Voice Line, choose the line your iPhone should use by default for calls and messages to people who are not in your contacts. Many people set their personal number as default and manually select the other line when needed.
Step 3: Set iMessage and FaceTime numbers
Go to Settings > Messages > Send & Receive and Settings > FaceTime and choose which phone numbers (and email addresses) can be used for iMessage and FaceTime. You can enable both numbers, which lets you receive messages on either one. Choose which number is used to start new conversations.
Step 4: Choose a line for mobile data
Under Settings > Cellular > Cellular Data, choose which line provides data. Only one line can provide mobile data at a time. This is the setting that matters most for travelers: set your local or travel plan for data, and your home line for calls and texts.
You can also enable Allow Cellular Data Switching. This lets the iPhone automatically use the other line’s data when the preferred line has poor coverage during a voice call, which helps you stay connected. Be careful with this setting if one of your lines has an expensive data plan or roaming charges, because it can use that plan without you noticing.
Step 4: Decide how Contacts are handled
Open a contact, tap Edit, and look for Preferred Cellular Plan (or Preferred Line). You can assign a specific line to a specific person. For example, your boss always gets a call from your work line, and your family always gets one from your personal line. When you call or message that contact, the iPhone uses the line you selected automatically.
Step 5: Switch lines when you call or text
Even with defaults set, you can choose a line for any individual call or message.
- In the Phone app: open the keypad, and tap the line indicator at the top of the screen to choose the line.
- In Messages: when you start a new message, tap the sender line in the top area to choose which number to use.
- From Contacts: choose the line in the contact’s details before you call.
Once you set these options, you rarely have to think about them again.
What Happens During Calls, Texts, and Data
Once both lines are active, it helps to know how the iPhone behaves day to day.
Incoming calls and texts
Both numbers can receive calls and messages at the same time. The Phone app shows which line a call came in on, using the label you chose, so you know whether to answer professionally or casually.
What happens when you are already on a call
This is the most common surprise. If you are on a call on one line, an incoming call on the other line may go straight to voicemail, because the phone’s radio can only be fully active on one line at a time in some setups. Enabling Wi-Fi Calling for each line often solves this, because the call is carried over the internet instead. Behavior varies by carrier and model, so test it with a friend before you depend on it.
Wi-Fi Calling
Go to Settings > Cellular, tap a line, and turn on Wi-Fi Calling. It is especially useful at home, in basements, or abroad, where it lets you make and receive calls over Wi-Fi on your home number.
5G and data speeds
Many recent iPhones can use 5G on both lines, but only one line provides mobile data at a time. Your carrier’s support and plan decide how fast each line is.
Personal Hotspot
Hotspot uses whichever line is set for mobile data. If you share your connection with a laptop, confirm that the right line is selected so you do not use the wrong plan.
Using Dual SIM When You Travel
Travel is where dual SIM really pays for itself.
The smart travel setup
- Keep your home line active for calls, texts, and verification codes from your bank.
- Add a local or regional travel eSIM for mobile data at your destination.
- In Settings > Cellular > Cellular Data, choose the travel plan.
- Open your home line’s settings and turn off Data Roaming, so your home carrier cannot bill you for data abroad.
- Turn on Wi-Fi Calling on your home line if your carrier supports it.
You will pay local prices for data while still being reachable on your normal number.
Tips for travel eSIMs
- Install the eSIM before you leave, while you have a reliable connection. In some countries, installing new profiles on arrival can be difficult.
- Check that your iPhone is unlocked and supports the provider you choose.
- Read the plan details. Many travel eSIMs are data-only and offer no phone number, so rely on apps like iMessage, FaceTime, or WhatsApp for communication.
- Check the activation rule. Some eSIMs begin their validity period when installed, others when first connected to a network.
- Delete the eSIM after the trip to keep your list tidy, but only once you are sure you do not need it again, because some codes cannot be reinstalled.
Other Smart Ways to Use Two Lines
- Work and personal. Assign contacts to the right line and silence the work line in the evening using Focus modes.
- Better coverage. Pair two carriers so that if one is weak in your area, the other can help.
- Cheaper plans. Keep a low-cost data-only plan for internet and a basic plan for calls.
- Temporary lines. Use a short-term number for online listings, deliveries, or sales, and delete it later to protect your main number.
- Living between two countries. Keep both local numbers on one phone.
Managing, Switching, and Removing eSIMs
Switching your active lines
Go to Settings > Cellular, then tap the line you want and use Turn On This Line or Turn Off This Line. You can switch lines on and off as needed. Remember that only two can be active at once.
Renaming a plan
Tap the line and choose Cellular Plan Label to change the name.
Deleting an eSIM
Tap the line, scroll down, and choose Delete eSIM (or Remove Cellular Plan). Be careful. Once you remove an eSIM, you often cannot reinstall it with the same QR code. You may need to contact your carrier for a new one. Never delete an eSIM that carries your main number unless you are sure you can get it back.
Moving to a new iPhone
Before you wipe or trade in your old phone, transfer your eSIM using the methods above, or contact your carrier to arrange it. Skipping this step can leave you without your number for a while.
Security and Privacy
eSIM has real security benefits. It cannot be pulled out of a stolen phone, which makes it harder for a thief to take your number somewhere else. But there are a few things to watch.
- Add a PIN to your carrier account. Scammers sometimes try to trick carriers into moving your number to their device, a trick called SIM swapping. A strong account PIN makes this harder.
- Set a SIM PIN on physical cards under Settings > Cellular > SIM PIN.
- Use an authenticator app instead of text-message codes for important accounts, so your security does not depend on a phone number alone.
- Turn on Stolen Device Protection and keep Find My enabled.
- Be careful with QR codes. Only scan eSIM codes from your carrier or a provider you trust.
Troubleshooting Common Problems
“No service” or no signal on the second line
- Check that the line is turned on in Settings > Cellular.
- Turn on Airplane Mode, wait ten seconds, and turn it off.
- Restart your iPhone.
- Check Settings > General > About for a prompt to update carrier settings.
- Update to the latest iOS.
The eSIM will not activate
- Confirm that you are connected to a good Wi-Fi or mobile data connection.
- Check that the QR code has not already been used.
- Make sure your iPhone is unlocked and compatible with that carrier.
- Ask your carrier to issue a new code.
“Unable to complete cellular plan change”
Restart the iPhone, update iOS, and try again. If it persists, contact your carrier, because the profile may be blocked.
Calls go to the wrong line
Check your Default Voice Line, the contact’s Preferred Line, and your Wi-Fi Calling settings.
Messages or FaceTime use the wrong number
Go to Settings > Messages > Send & Receive and Settings > FaceTime, and choose the correct number.
Data stops working or is slow
Check Cellular Data and make sure the intended line is selected. Check Data Roaming, and confirm that the plan has not run out.
Still stuck?
Try Settings > General > Transfer or Reset iPhone > Reset > Reset Network Settings. This clears saved Wi-Fi networks and Bluetooth pairings, but it does not delete your eSIM profiles, though you should confirm with your carrier first. If the problem remains, contact your carrier or Apple Support.
Pro Tips for a Smoother Dual SIM Life
- Label everything clearly, especially if you carry more than two plans.
- Take screenshots of your QR codes and keep them somewhere private, though remember that many can only be used once.
- Save your carrier’s support number and account PIN in a secure password manager.
- Use Focus modes to silence your work line outside work hours.
- Review your plans regularly. Delete old travel eSIMs and cancel unused lines.
- Test before a trip. Make a call and a data session on each line before you leave home.
Frequently Asked Questions
Can I use two eSIMs at the same time?
Yes, on iPhone 13 and later. Two lines can be active at once, and you can store several more profiles.
Can I use two physical SIM cards?
Only on certain regional models, such as those sold in mainland China, which have two physical SIM slots. Most iPhones pair one physical SIM with one eSIM.
Does dual SIM drain my battery faster?
Slightly, in some situations, because the phone maintains two connections. Most people will not notice a big difference.
Do I need Wi-Fi to install an eSIM?
You need an internet connection, either Wi-Fi or mobile data. Wi-Fi is usually the most reliable.
Can I use WhatsApp with two numbers on one iPhone?
A standard WhatsApp account is tied to one number per app, but WhatsApp has been adding multi-account features, and a business version exists. Check the latest options in the app.
Is eSIM safer than a physical SIM?
In some ways. It cannot be physically removed from a stolen phone. But it is still vulnerable to SIM swapping through your carrier, so protect your account with a PIN.
Can I move an eSIM to an Android phone?
Usually you need to ask your carrier to issue a new eSIM for the new device. Direct transfers between iPhone and Android are limited.
What happens to my eSIM if I reset my iPhone?
When you erase the phone, you are usually asked whether to keep or delete your cellular plans. Choose carefully, and consult your carrier if you are unsure.
Final Thoughts
Dual SIM looks complicated at first, but once you understand the pieces, it is surprisingly simple. An eSIM gives you flexibility, a physical SIM gives you familiarity, and together they let one iPhone handle two numbers, two plans, and two parts of your life.
The steps are always the same. Check that your iPhone and carrier support it. Add the eSIM through Settings, a QR code, or your carrier’s app. Label both lines. Choose a default line, a data line, and your messaging numbers. Then test it, so there are no surprises when you need it most.
Once it is set up, you will wonder why you ever carried two phones, paid roaming fees, or waited in a shop to swap a card.
Do you use dual SIM on your iPhone? Share your setup in the comments.